Fruition Seeds: 6 Mistakes to Avoid When Planting Garlic and Shallots
This article was authored by Petra Page-Mann, one of the owners of Fruition Seeds. This article and photos are being republished with their permission from their website.
Garlic is one of the easiest and most rewarding crops to grow, though it’s not a cakewalk. I’ve grown garlic here in the Finger Lakes for over nearly three decades and here are the keys to surrounding yourself with abundance.
Over the years we’ve become enamored with growing shallots as well, which are grown in exactly the same way.
1. Choosing the Best Garlic & Shallots to Plant
As we all know (and mostly have learned the hard way), what you reap is what you sow. Considering how long your garlic and shallots are in the ground and how much time you’ll invest in weeding and feeding them, it’s worth the extra dollars sowing the best stock possible. You’ll reap that much more when you harvest.
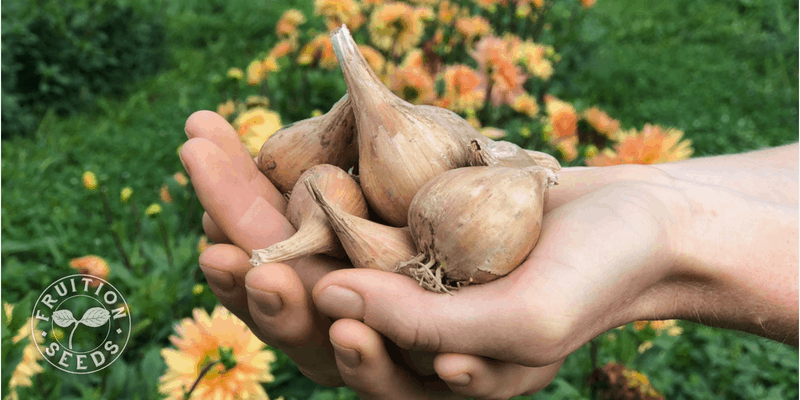
Biggest Mistake: Planting anything but the biggest and healthiest organic garlic and shallot bulbs you can find.
Why? There is a direct relationship between the size of bulbs and cloves you plant the size of the bulbs and cloves you’ll harvest. It’s not often true, but in the case of garlic and shallot ‘seed stock,’ bigger truly is better, as long as they’re still healthy and especially if they’re organic.
Easy Solution: Don’t skimp! Ask your local organic growers if they have any seed stock they’ll be willing to sell you. We grow tens of thousands of gorgeous organic seed-stock bulbs of both garlic and shallots of many different varieties, all well-adapted to our short seasons. You’ll find them at www.fruitionseeds.com.
2. When to Plant Garlic & Shallots
Garlic is planted in fall, allowing the cold to divide each clove into the bulb to come. Plant between Halloween and Thanksgiving for the healthiest garlic growth. Your goal is for each clove to establish its root system while growing as little shoot as possible.
Biggest Mistake: Planting too early.
Why? Garlic establishes it’s root system before sending up a green shoot. Planted too early, the green shoot can rise several inches, acting as a straw over the winter to draw water from the clove, effectively desiccating the clove and potentially killing it.
Easy Solution: Plant between Halloween and Thanksgiving.
3. Preparing Soil for Garlic & Shallots
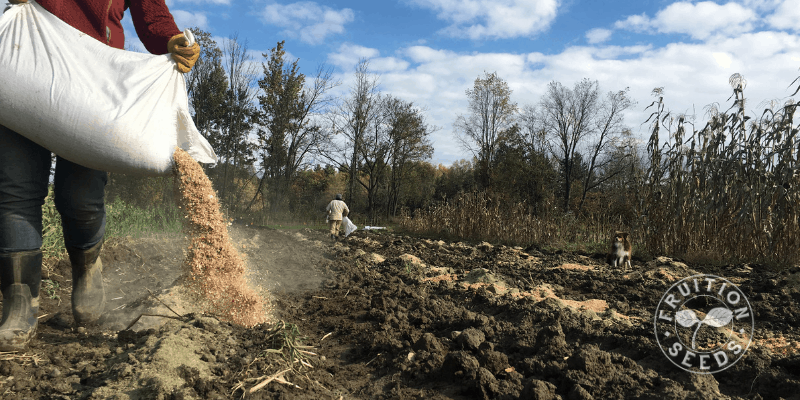
We till the soil for our garlic bed as close to planting as possible, which can be tricky in the cool, wet soils of autumn. Before we work the soil, we add compost as well as Fruition’s organic granular fertilizer, acting as slow-release full-spectrum nutrition for the soil as well as the crop. It’s a blend of vegetable- as well as animal-sourced minerals and humic acid to feed your soil as well as your garlic throughout the season.
Biggest Mistake: Not enough fertility added or too much nitrogen added.
Why? Garlic is a ‘heavy feeder,’ so it will not grow large if nutrients are lacking. If its fertility is too nitrogen-rich, however, garlic will focus on vegetative growth, resulting in large leaves above small bulbs. Excess nitrogen also decreases storage life.
Easy Solution: Add rich, well-balanced compost as you prepare your soil, including organic slow-release fertilizer, if you can.
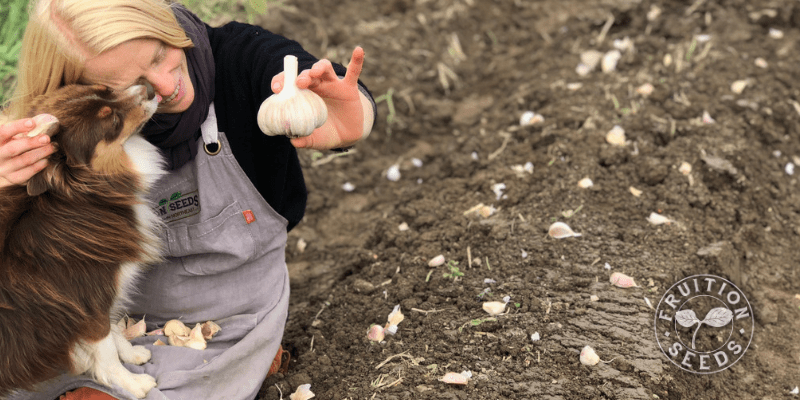
4. How to Plant Garlic & Shallots

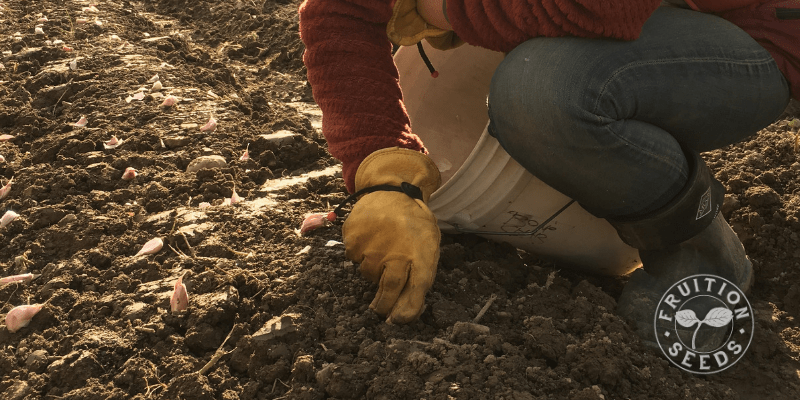
First things first! Break each bulb into individual cloves and plant each clove tip up and root plate down.
Common Mistake: Planting cloves upside down.
Why? Garlic will only grow roots and shoots from specific places in its clove. When planted upside down, the shoot will go down and force its way to the sky despite, making way more work for your garlic to thrive. This also makes it more challenging to harvest, cure and store your garlic.
Easy Solution: watch our tutorial and plant tip up!
5. Optimum Shallot & Garlic Spacing
Garlic is ideally planted with six inches between cloves, both in and between rows. We give a little more space, sowing with eight-inch centers, because we want to limit competition between plants both above and below the ground.
Common Mistake: Planting too close.
Why? Too close, garlic plants will compete with each other, to their detriment. Their roots compete for the same, finite nutrients. Leaves overlap, competing for sunlight.
Easy Solution: Bring a yardstick or some other measurement tool to the garden, helping keep you on-point, not too close or too far.
6. How Deep to Plant Garlic & Shallots
Planting depth makes all the difference. At a minimum, sow each clove three inches deep and then be sure to spread six inches of mulch or more. If you’re not planning to mulch, sow at least five inches deep.
Common Mistake: Not planting deep enough.
Why? Planted in fall and not growing rapidly until spring, garlic experiences the most dramatic freeze-thaw frost heaving of the season, bringing each clove to the surface if they’re not deep enough. Garlic will tolerate impressively cold temperatures but quickly succumbs to desiccating winter winds at the soils’ surface.
Easy Solution: Work soil well, so it’s easy to plant as deep as you need.
7. Garlic and Shallots: To Mulch or Not to Mulch?
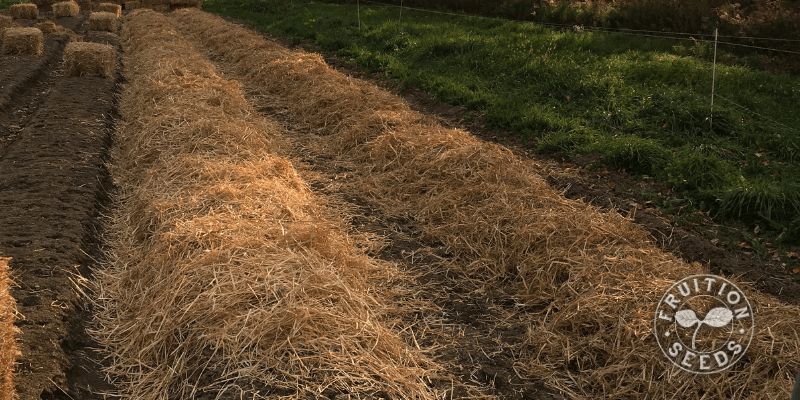
Until recently, I’ve always planted garlic and immediately spread six inches (often more!) of straw or shredded leaf mulch to cover. These last few years we’ve been experimenting with other techniques, which have a lot of merit. My favorite mulches are straw, grass clippings, deciduous leaves sent through a chipper/shredder and, believe it or not, moldy hay.
Common Mistake: Not mulching if you don’t always weed thoroughly or on-time. Mulching too little when you do mulch, resulting in more work and more weeds.
Why? Garlic is only an easy crop if you manage it more or less perfectly. It can easily become weedy, whether you mulch or not. The trick with mulch: be sure you’re adding a lot, knowing it will decompose and condense, and be prepared to hand-weed a bit and add several inches more mulch once and often twice in spring.
Easy Solution: Spread six inches of mulch or more as soon as you sow, spreading more in spring as needed.
[…] https://groundswellcenter.org/fruition-seeds-6-mistakes-to-avoid-when-planting-garlic-and-shallots/ […]